Why Knowing How to Write Out a Check Still Matters in Real Estate
Learning how to write out a check remains a crucial financial skill, especially in real estate transactions where checks are often required for earnest money deposits, down payments, and closing costs. Even though most of the common day-to-day financial transactions are electronic, knowing how to write a check remains a valuable skill.
Quick Steps to Write a Check:
- Write the date in the top-right corner (MM/DD/YYYY format)
- Fill in the recipient’s name on the “Pay to the order of” line
- Enter the numerical amount in the dollar box (e.g., $1,500.00)
- Write out the amount in words on the line below (e.g., “One thousand five hundred and 00/100”)
- Add a memo (optional) to note the payment purpose
- Sign your name in the bottom-right corner
Checks offer unique advantages in real estate deals. They create a paper trail, work when digital systems fail, and many small businesses and contractors still prefer them to avoid credit card processing fees. When you’re making a down payment on a home or paying a plumber for repairs, you’ll need this fundamental skill.
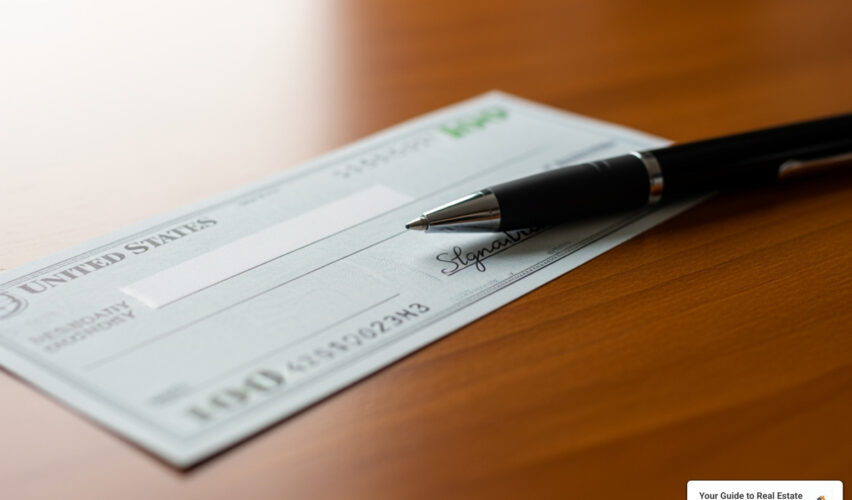
The key is accuracy and security. Never write a check in pencil – it’s easy to erase and alter. Always use blue or black ink, preferably a gel pen that’s tough to remove. Fill in all spaces completely to prevent fraud, and keep detailed records of every check you write.

Basic how to write out a check vocab:
The Anatomy of a Check: Understanding Each Part
Before you master how to write out a check, you need to understand what you’re working with. Think of a check as your written promise to pay someone – it’s actually a legal document that tells your bank to move money from your account to theirs. Every single line and number has a purpose, and knowing what goes where will help you avoid costly mistakes.
 - how to write out a check")
Your Personal Information
Look at the top left corner of your check – that’s where you’ll find your pre-printed name and address. This isn’t just decoration; it identifies you as the account holder to anyone who receives the check. Your bank prints this information when they create your checks, so it should match exactly what’s on file with them.
If you’ve recently moved or changed your name (maybe after getting married), make sure to order new checks with updated information. Using checks with old addresses won’t necessarily void them, but it can cause confusion and delays, especially in real estate transactions where accuracy matters most.
The financial institution’s name is also printed on your check, usually at the top center or top right. This tells everyone which bank will be paying the money.
The Payment Details
These are the blank spaces you’ll fill in every time you write a check. Getting these right is crucial for the payment to go through smoothly.
The payee line starts with “Pay to the order of” and gives you space to write who gets the money. Always use the person’s or company’s full legal name here. If you’re paying your real estate agent, use their full professional name exactly as it appears on their business cards.
The date line sits in the upper right corner. While it might seem simple, the date you write here has legal significance. It tells the bank when the check becomes valid for cashing.
You’ll notice there are actually two places for the dollar amount on every check. The small numeric amount box (next to the $ sign) is where you write the numbers, like $1,500.00. The longer written amount line below the payee is where you spell out the same amount in words.
The memo line at the bottom left is optional but incredibly helpful. This is where you can note what the payment is for – “April rent” or “earnest money deposit” – which helps both you and the recipient keep track of the transaction’s purpose.
Finally, there’s the signature line at the bottom right. Without your signature, the check is just a piece of paper. Your signature makes it official and legally binding.
The Bank Information
Turn your check over and look at the bottom – you’ll see a series of numbers that might look like code. These numbers are printed in special magnetic ink that bank machines can read automatically.
The routing number is always nine digits and comes first. Think of it as your bank’s zip code in the financial world. Every bank has its own unique routing number, and it tells other banks exactly where to send payment requests. For a deeper dive into routing numbers and how they work, check out our guide: More info about routing numbers.
Your account number comes next and identifies your specific checking account. While routing numbers are the same for everyone at your bank, your account number is yours alone. This ensures the money comes out of the right place.
The check number appears both at the bottom of the check and in the upper right corner. These numbers run in sequence, helping you track which checks you’ve written. When you balance your checkbook or look for a specific transaction, these numbers become your best friend.
Some checks also show a bank’s fractional number, usually in the upper right corner. This is an older system that some banks still use to identify themselves and their location.
Understanding these parts takes the mystery out of how to write out a check. Once you know what each section does, the actual writing process becomes much more straightforward and secure.
Your Step-by-Step Guide on How to Write Out a Check
Now that we’ve explored the anatomy of a check, it’s time to put pen to paper! Writing a check might feel old-fashioned in our tap-and-swipe world, but it’s still essential for many situations – especially in real estate where earnest money, security deposits, and contractor payments often require checks.

Before you start, grab a blue or black ink pen – never a pencil! Pencil marks can be erased and altered, opening the door to fraud. A gel pen is your best friend here because the ink resists tampering. Write clearly in print for everything except your signature, and remember that legibility is your first line of defense against confusion and fraud.
For a comprehensive visual guide, check out A detailed guide to check writing that walks through each step with illustrations.
Step 1: Write the Current Date
Start with the date line in the upper right corner. Use today’s date in a clear format like “March 5, 2024” or “03/05/2024.” This seems simple, but it’s more important than you might think.
Post-dated checks – those with future dates – can create headaches. While you can write “April 15, 2024” on your check today, banks aren’t required to wait until that date to process it. If someone deposits your post-dated check early and you don’t have enough money in your account, you’ll face overdraft fees. It’s usually better to wait until the payment date or use a different payment method.
Backdating checks is risky business and can even be illegal in some situations. It might seem harmless to use yesterday’s date, but it can mess up financial records and create legal issues. Stick with today’s date unless you have a compelling, legitimate reason not to.
Step 2: Name the Recipient (Payee)
The “Pay to the order of” line is where you’ll write exactly who gets paid. Accuracy matters here – a lot.
For individuals, use their full legal name including any suffixes like “Jr.” or “III.” If you’re paying your contractor John Smith Jr., write exactly that. For businesses, spell out the complete business name as it appears on their invoices or business cards. “ABC Plumbing, LLC” is different from “ABC Plumbing” in the banking world.
Writing a check to “Cash” turns your check into the equivalent of carrying cash – anyone who finds it can cash it. Only do this if you’re heading straight to the bank yourself.
You can write a check to yourself by putting your own name on the payee line. This is handy for transferring money between accounts at different banks or getting cash when you don’t have your debit card.
When writing a check to two people, the word you choose between their names matters. “John and Jane Smith” means both people must sign the back to cash it – perfect for wedding gifts or joint payments. “John or Jane Smith” means either person can handle it alone, which works well for roommates or business partners.
Step 3: Enter the Numerical Amount
Find the small box next to the dollar sign – this is your numerical amount box. Start writing your first digit as close to the dollar sign as possible. This prevents someone from squeezing in extra numbers to change “$50.00” into “$150.00.”
Always include cents with a decimal point, even for round amounts. Write “$50.00” not “$50” and “$50.32” for fifty dollars and thirty-two cents. Fill the entire box with your numbers, leaving no extra space for alterations.
Step 4: Write Out the Amount in Words
This line below the payee’s name is your security blanket. Banks typically honor the written amount if there’s a discrepancy with the numbers, so get this right.
Start writing as far left as possible and spell out the dollar amount: “Fifty” for $50, “One thousand” for $1,000. For cents, use fractions over 100 – so 32 cents becomes “32/100” and no cents becomes “00/100” or you can write “even.”
After you finish writing the amount, draw a line from the end of your words to “Dollars” printed on the right side of the line. This prevents anyone from adding extra words. Your line might look like: “Fifty and 32/100 ————————————— Dollars.”
Step 5: Fill in the Memo Line (Optional)
The memo line in the bottom left corner is optional, but it’s incredibly useful for your records and the recipient’s bookkeeping. Think of it as leaving yourself a note about why you wrote this check.
Write brief descriptions like “January Rent,” “Plumbing Repair,” or “Invoice #12345.” If you’re paying a bill, include your account number with that company – it helps them apply your payment correctly and prevents confusion.
This small detail becomes invaluable when you’re reviewing bank statements months later or organizing receipts for taxes. Future you will thank present you for this simple step.
Step 6: Sign the Check
Your signature in the bottom right corner transforms your check from a piece of paper into a legal financial instrument. This authorizes your bank to transfer the money from your account.
Your signature should match what your bank has on file for your account. Consistency helps prevent fraud and ensures smooth processing. If your signature has changed significantly since you opened your account, consider updating it with your bank.
Here’s the golden rule: never sign a blank check. A signed blank check is essentially cash that anyone can fill out for any amount to any recipient. Always complete every other field before you sign. This one habit can save you from financial disaster.
Step 7: Record the Transaction
Don’t put that pen away just yet! Recording your transaction in your checkbook register or a personal ledger is the final crucial step that many people skip.
Write down the transaction date, check number, payee name, and amount. Then subtract this amount from your previous balance to calculate your new account balance. This running tally helps you avoid overdrafts and keeps you aware of your spending.
Even with online banking and mobile apps showing real-time balances, keeping your own records helps you catch errors, track pending transactions, and maintain better control over your finances. When you’re managing real estate transactions with multiple checks for inspections, repairs, and closing costs, this record-keeping becomes even more critical.
How to write out a check successfully means completing every step carefully and keeping good records. Take your time, double-check your work, and remember that a few extra minutes of attention now can prevent headaches later.
Best Practices for Check Security and Common Issues
Writing a check correctly is only half the battle – protecting yourself from fraud and knowing how to handle mistakes is just as important. While check fraud isn’t as common as it once was, it still happens, and a few simple precautions can save you from major headaches down the road.

The foundation of check security starts with the pen you choose. Never write a check in pencil – it’s like leaving your front door open uped. Always use a non-erasable pen with blue or black ink. Many financial experts swear by black gel pens because their ink is particularly resistant to check washing, a sneaky technique fraudsters use to remove ink and alter check amounts.
Filling all blank spaces is your next line of defense. Those empty spots on your check are like blank canvases for criminals. By writing your amounts close to the dollar sign and drawing lines to fill remaining space, you make it nearly impossible for someone to add extra digits or words.
When it comes to mailing checks, think of them as cash in an envelope. Use security envelopes or tuck the check between other papers so it’s not visible. Never leave outgoing mail in your personal mailbox with the flag up – it’s basically advertising that there’s something valuable inside. Instead, drop checks directly at the post office or use a secure USPS collection box.
If your checkbook goes missing, treat it like a stolen credit card and contact your bank immediately. The faster you report it, the better your bank can protect your account from unauthorized transactions. Similarly, if you need to prevent a check from being cashed – maybe you made a serious error or have a dispute with the recipient – you can request a stop payment order. Just know that banks typically charge a fee for this service, usually around $30.
Bounced checks are every check writer’s nightmare. When you write a check for more money than you have in your account, it “bounces” back to the recipient unpaid. This triggers fees from both your bank and possibly the recipient’s bank too. More importantly, it can damage relationships and even lead to legal trouble if not resolved quickly.
How to handle a mistake when you write out a check
Let’s be honest – mistakes happen, especially when you’re still learning how to write out a check. The key is knowing when you can fix an error and when you should start over.
Minor slip-ups like a small typo in the memo line or a barely noticeable ink smudge might be correctable. If you catch the mistake immediately, you can sometimes make a neat correction and initial next to it. However, this approach is risky because some banks and recipients might question the alteration.
Major mistakes require a fresh start. If you’ve written the wrong payee name, entered an incorrect dollar amount, or made the check illegible in any way, it’s time to void that check and grab a new one. Trust us – the few seconds it takes to start over can save you hours of headaches later.
How to Properly Void a Check
Voiding a check is straightforward, but doing it properly is crucial for your security. Think of it as permanently deactivating the check so it can never be used for payment.
Take a pen and write “VOID” in large, bold letters across the entire front of the check. Some people prefer to write “VOID” across each individual field – the date line, payee line, amount areas, and signature line. Either approach works, as long as the word “VOID” is clearly visible and makes the check unusable.
Don’t forget to record the voided check in your checkbook register. Note the check number and the date you voided it. This keeps your records straight and explains why that particular check number isn’t tied to any transaction.
Here’s something many people overlook: never just toss a voided check in the trash. Even though it’s voided, it still contains your bank account and routing numbers – everything a criminal needs to create fraudulent checks. Either shred it immediately or store it securely with your other financial documents.
How long is a check valid for?
This question comes up more often than you’d think, especially in real estate transactions where checks might sit in escrow for weeks. Personal checks typically expire after six months (180 days) from the date written on them.
After this period, banks aren’t legally required to honor the check. They might contact you for approval before processing it, or they might simply “bounce” it back to the recipient. These aged checks are called “stale-dated” checks, and while some banks might still process them, it’s always best for recipients to deposit checks promptly.
The six-month rule isn’t set in stone – individual banks may have their own policies that are more or less restrictive. When in doubt, contact your bank directly to understand their specific guidelines.
Check Alternatives and Other Payment Forms
While mastering how to write out a check remains valuable, especially for real estate transactions, today’s digital world offers plenty of faster and more convenient payment options. The beauty is that each method has its place – checks for formal transactions like earnest money deposits, and digital payments for everyday expenses.
Let’s be honest: most of us reach for our phones or cards before we think about pulling out a checkbook. But understanding your options helps you choose the right payment method for each situation.
How to write out a check to two people
Remember when we briefly touched on this earlier? Writing a check to multiple people requires a simple but important decision about one little word.
When you write “John AND Jane Smith” on the payee line, you’re requiring both people to sign the back of the check before it can be cashed or deposited. This is perfect for situations like wedding gifts, joint business payments, or anytime you want both parties involved in the transaction.
If you write “John OR Jane Smith” instead, either person can handle the check independently. This gives more flexibility but less control over who actually processes the payment. Think of it like this: “and” means teamwork required, while “or” means either person can fly solo.
Always check with your recipients about their preference. Nothing’s more awkward than handing over a check that can’t be easily processed!
Alternatives to Writing a Check
For everyday transactions, you’ve got some fantastic alternatives that might be more your speed. Digital wallets like Zelle, Venmo, and PayPal have revolutionized how we split dinner bills and pay friends back. They’re instant, convenient, and perfect for smaller amounts.
Your bank’s online bill pay service is a game-changer for recurring payments. Instead of writing monthly checks for utilities or mortgage payments, you can set everything up once and let your bank handle the rest. They’ll send electronic payments or even physical checks on your behalf – it’s like having a personal assistant for your bills.
ACH transfers work behind the scenes for things like direct deposit and automatic bill payments. They’re the workhorses of electronic banking, moving money reliably between accounts without the fees of wire transfers.
Speaking of wire transfers, these are your go-to for large, time-sensitive payments, especially in real estate closings. They’re immediate and final, though they come with higher fees. When you’re buying a house and need to transfer your down payment, wire transfers ensure the money arrives exactly when needed.
Of course, debit and credit cards dominate most purchases, offering convenience and fraud protection that checks simply can’t match.
Here’s the thing though – checks still shine in certain situations. They create an undeniable paper trail that’s invaluable in legal or business contexts. When you’re dealing with contractors, making large payments, or handling real estate transactions, that physical record can be worth its weight in gold.
For more details on the flip side of check handling, our comprehensive guide covers everything you need to know: How to Deposit a Check: A Comprehensive Guide.
The key is knowing when each payment method serves you best. Checks might not be your daily driver anymore, but they’re still an essential tool in your financial toolkit.
Frequently Asked Questions About Writing Checks
Even after walking through the complete process of how to write out a check, we know you might still have some lingering questions. That’s completely normal! Check writing involves several nuances that can feel confusing at first. Let’s tackle the most common questions we hear from readers who are mastering this essential financial skill.
What is a post-dated check and can a bank cash it early?
A post-dated check is one where you write a future date instead of today’s date. Maybe you want to pay your landlord on the first of next month, so you write “April 1st” even though it’s still March 25th. The idea seems straightforward – the recipient should wait until that date to cash it, right?
Unfortunately, it’s not that simple. Banks are generally not required to hold post-dated checks until the written date arrives. Most banking systems process checks automatically based on when they’re presented, not the date you wrote on them. This means your “April 1st” check could potentially clear your account on March 26th if the recipient deposits it early.
Here’s where it gets tricky: if you don’t have enough money in your account when that early deposit happens, you’ll face overdraft fees from your bank. The recipient’s bank might also charge fees for the bounced check. State laws vary on post-dating rules, but most don’t offer strong protection for check writers.
Instead of relying on post-dated checks, consider using your bank’s online bill pay feature with a scheduled future payment date. This gives you much more control over when the payment actually leaves your account.
How do I endorse a check to deposit or transfer it?
When someone writes you a check, you’ll need to endorse it by signing the back before you can deposit or cash it. Think of endorsing as officially accepting ownership of the funds. The way you sign the back determines what happens next.
For most deposits, use a restrictive endorsement – this is the safest approach. Sign your name on the back, then write “For Deposit Only” underneath, along with your account number if you want extra security. This means even if someone finds your endorsed check, they can only deposit it into your specific account.
A blank endorsement means you simply sign your name on the back. While this is the most common method, it’s also the least secure because anyone who finds the check after you’ve signed it could potentially cash it. Only use blank endorsements when you’re immediately depositing or cashing the check.
Special endorsements let you transfer a check to someone else. You’d write “Pay to the order of [New Person’s Name]” above your signature. The new recipient then signs below your endorsement to cash or deposit it. However, many banks have become wary of third-party endorsements due to fraud concerns, so check with your bank first.
Always endorse in blue or black ink, and only sign the back when you’re ready to complete the transaction.
What is the difference between a check, a money order, and a cashier’s check?
These three payment methods might look similar, but they work very differently when it comes to security and guaranteed funds. Understanding these differences will help you choose the right payment method for different situations.
A personal check is what we’ve been discussing throughout this guide. It’s drawn directly from your checking account and is only as good as the funds you have available. The recipient trusts that you have enough money to cover the amount, but there’s always a risk of insufficient funds.
Money orders work like prepaid checks. You buy them with cash or a debit card from places like post offices, convenience stores, or banks, typically for a small fee of $1 to $5. Since you pay upfront, the funds are guaranteed. Money orders are perfect for smaller payments when the recipient doesn’t know you well enough to trust a personal check, or if you don’t have a checking account.
Cashier’s checks offer the highest level of security and are issued by banks using their own funds. When you request one, the bank immediately withdraws money from your account and issues a check drawn on their funds instead of yours. This guarantees the payment will clear, which is why cashier’s checks are commonly required for large real estate transactions like earnest money deposits or down payments.
In real estate, you’ll often encounter situations where cashier’s checks are specifically required. Sellers and their agents want the security of knowing funds are guaranteed, especially for significant amounts. While a cashier’s check typically costs $5 to $15, that small fee provides peace of mind for everyone involved in the transaction.
Understanding when to use each type of payment instrument will serve you well, whether you’re paying monthly bills with personal checks or making a major real estate purchase with a cashier’s check.
Conclusion
Congratulations! You’ve now mastered the art of how to write out a check – a skill that might seem old-fashioned but remains surprisingly relevant in today’s world. Whether you’re making an earnest money deposit on your dream home, paying a contractor who prefers paper payments, or simply need a backup when digital systems go down, you’re now equipped with the confidence to handle any check-writing situation.
Think of this knowledge as part of your financial toolkit. Just like knowing how to change a tire or cook a basic meal, understanding how to write out a check properly is one of those life skills that proves invaluable when you need it most. In real estate especially, where large sums of money change hands and paper trails matter, this skill can save you from embarrassing mistakes or costly delays.
Remember the key principles we’ve covered: always use a pen with permanent ink, fill in every space completely to prevent fraud, and keep detailed records of every transaction. These simple habits protect both your finances and your peace of mind. When you’re dealing with something as important as buying or selling property, these details matter more than you might think.
The beauty of checks lies in their reliability and permanence. While payment apps might crash and digital systems can fail, a properly written check creates an undeniable paper trail that banks, lawyers, and courts all recognize. It’s a level of financial formality that commands respect and provides security for everyone involved.
As you continue your real estate journey, financial literacy extends far beyond knowing how to write out a check. It’s about understanding every aspect of your transactions, from mortgage payments to closing costs. At Your Guide to Real Estate, we believe that informed buyers and sellers make better decisions and achieve better outcomes.
Ready to put your newfound check-writing skills to work in a real estate transaction? Our experienced team is here to guide you through every step of the buying or selling process, ensuring you feel confident and prepared for success.
Find a real estate agent to guide you


")