Understanding Ceiling Fan Installation Costs for Your Home
Ceiling fan installation cost varies widely based on your specific situation, but understanding the basics can help you budget effectively for this valuable home improvement.
Quick Cost Overview:
- Simple replacement: $100-$300
- New installation with existing wiring: $200-$500
- Complex installation requiring new wiring: $350-$2,000+
- Average professional installation: $248-$250
Ceiling fans offer multiple benefits that make them an attractive investment for homeowners. They improve air circulation throughout your space, helping distribute both cool and warm air more effectively. This improved airflow can increase energy efficiency by allowing you to set your thermostat a few degrees higher in summer or lower in winter while maintaining comfort.
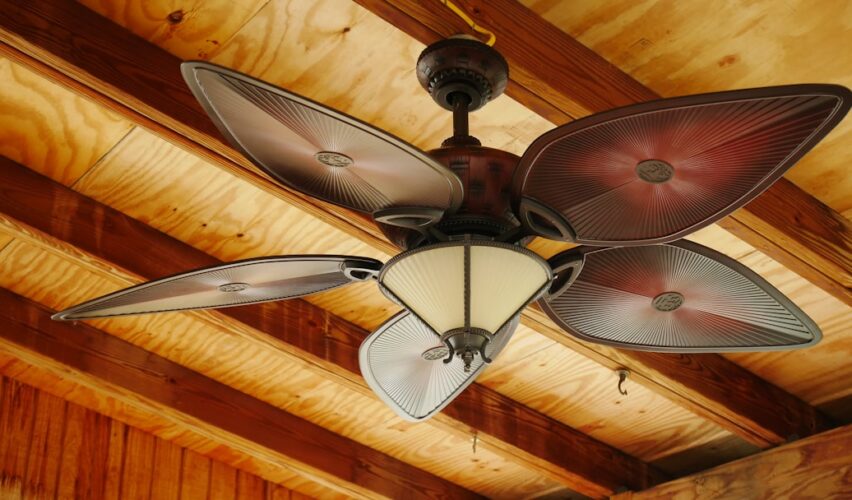
Beyond functionality, ceiling fans serve as an important aesthetic element in your home’s design. They come in countless styles, from sleek modern designs to rustic farmhouse looks, making them both a practical upgrade and a decorative centerpiece.
The total cost depends on several key factors. Project complexity plays the biggest role – replacing an existing fan is much cheaper than installing one where no wiring exists. Professional installation versus DIY also significantly impacts your budget, with safety considerations often making professional installation the smarter choice.
Most installations fall into three categories: simple replacements using existing wiring, moderate installations requiring some electrical work, and complex projects needing new circuits or structural modifications.

Ceiling fan installation cost terms made easy:
Understanding the Average Cost to Install a Ceiling Fan
Planning your ceiling fan installation? Let’s break down what you can realistically expect to spend on this home improvement project.
The national average cost sits comfortably between $248 and $250 for a standard professional installation. This assumes you already have suitable wiring in place and need a straightforward replacement or installation.
But here’s where it gets interesting – the typical price range spans much wider, from $100 to $600 or more. Why such a big difference? It all comes down to what your specific project requires.
If you’re doing a simple replacement where you’re swapping out an old fan for a new one using existing wiring, you’re looking at the lower end: $100 to $300. This is the sweet spot for most homeowners who just want to upgrade what’s already there.
However, complex installation projects can climb significantly higher, ranging from $350 to $2,000 or more. These involve running new electrical lines, installing new circuits, or making structural changes to accommodate your new fan.
| Scenario | Description | Estimated Cost Range |
|---|---|---|
| Simple Replacement | Swapping an existing fan or light fixture with compatible wiring already in place | $100 – $300 |
| New Installation with Wiring | Adding a fan to a new location using nearby existing power sources | $200 – $500 |
| Complex New Installation | Installing where no wiring exists, requiring new circuits, extensive electrical work, and potential drywall repair | $350 – $2,000+ |
Labor Costs: Handyman vs. Electrician
Choosing the right professional significantly impacts your ceiling fan installation cost. Let’s look at your options.
Handyman rates typically run $50 to $80 per hour. They’re perfect for straightforward jobs like replacing an existing ceiling fan where everything’s already set up properly. If you’re confident the existing electrical box is fan-rated and the wiring is sound, a handyman can handle the swap efficiently and affordably.
Electrician rates range from $50 to $130 per hour, with some charging a flat rate for the first hour. While this seems pricier, their expertise becomes essential in specific situations.
When to hire an electrician becomes critical for new wiring projects. If you’re installing a fan where no overhead fixture existed before, an electrician ensures everything meets code compliance standards. They understand local electrical requirements and safety protocols that protect your family and your investment.
When a handyman is sufficient covers simple replacement scenarios with existing wiring that’s already compatible. If you’re just upgrading from one fan to another, or replacing a light fixture with a fan where the electrical box can handle the weight, a handyman often provides excellent value.
The key difference? Safety and complexity. For anything involving new electrical work, the peace of mind from hiring a licensed professional far outweighs the cost savings.
Material & Fan Costs
The fan itself represents a significant portion of your total investment, and there’s truly something for every budget and style preference.

Standard fan prices range from $50 to $300 and offer solid performance for most rooms. These come in various sizes and finishes, providing both function and style without breaking the budget.
Designer and smart fan prices climb higher, from $120 to $1,400 or more. Smart fans include Wi-Fi connectivity, app control, and integration with home automation systems. Designer models feature premium materials, unique aesthetics, and specialized engineering.
Don’t forget about the fan-rated electrical box – this often-overlooked component adds $100 to $150 to your project cost. If you’re replacing a standard light fixture, the existing box probably can’t support a fan’s weight and movement. This specialized box is a safety requirement, not an optional upgrade.
Mounting kits and downrods add another $10 to $100 depending on your ceiling height and fan requirements. High ceilings need downrods to position the fan at the optimal height for air circulation, while low-profile installations might require special mounting hardware.
These material costs might seem like add-ons, but they’re essential components that ensure your fan operates safely and effectively for years to come.
Key Factors That Influence Ceiling Fan Installation Cost
Every home tells a different story, and that story directly impacts your ceiling fan installation cost. While we’ve covered the averages, your specific situation might push costs higher or lower depending on several key factors.
Project complexity sits at the heart of pricing. Think of it like cooking – making scrambled eggs is simple and quick, but preparing a five-course meal requires more time, skill, and ingredients. The same logic applies to ceiling fan installation. Swapping out an old fan for a new one? That’s your scrambled eggs scenario. Installing a fan where none existed before, complete with new wiring and switches? That’s your elaborate dinner party.
Accessibility can turn a straightforward job into a challenging one. If your ceiling is 12 feet high or tucked into an awkward corner, your installer will need extra time and possibly special equipment. This translates directly into higher labor costs. Similarly, your ceiling type matters more than you might think. Standard drywall ceilings are installer-friendly, while plaster, concrete, or dramatically vaulted ceilings require additional expertise and time.
Here’s something worth considering for the long haul: Energy Star-certified ceiling fans might cost a bit more upfront, but they’re 60% more efficient than conventional models. That efficiency translates to real savings on your electric bill month after month. It’s one of those smart home upgrades that pays for itself over time. Speaking of home improvements that add value, you might find our guide on quick home sale tips helpful for other upgrade ideas.
New Installation vs. Replacing an Existing Fan
The difference between replacing an existing fan and installing a brand-new one is like the difference between repainting a room and adding a whole new room to your house. Both improve your home, but one requires significantly more work.
Replacing an existing fan is usually the more budget-friendly path. Your main concerns revolve around the condition of your existing wiring and whether your current electrical box can handle a fan’s weight and movement. If everything checks out, you’re looking at a relatively simple swap. However, if that electrical box wasn’t designed for a fan (many light fixture boxes aren’t), you’ll need to upgrade to a fan-rated box, which adds about $100 to $150 to your project.
Most replacement projects fall between $100 and $500 total, including both the fan and installation. The lower end assumes everything goes smoothly with minimal complications.
New installations are a different beast entirely. When there’s no existing fixture, your installer becomes part electrician, part detective, figuring out the best route to bring power to your desired location. This involves running new wires through walls or ceilings, potentially installing new switches, and sometimes even adding a dedicated circuit to your electrical panel.
The complexity here can vary dramatically. Installing a fan directly below an existing light fixture on the floor above? Moderately complex. Running wiring across your entire house to a location with no nearby power source? That’s heading into the complex category, with costs ranging from $350 to $2,000 or more.
Electrical Work and Additional Features
Beyond the basic installation, several electrical upgrades can improve your fan’s functionality while impacting your ceiling fan installation cost.
New wiring represents the biggest potential expense for installations without existing electrical infrastructure. Professional electricians typically charge $5 to $17 per square foot for basic wiring runs, though complex installations can reach $2,000 or more. This wide range reflects the reality that every home is different – running wire through an unfinished basement is much easier than threading it through finished walls and ceilings.
Many homeowners want separate controls for their fan and lights. Adding a new switch for independent control typically costs $100 to $200 additional. This upgrade requires running an extra wire to the fan location and installing a dual switch setup on your wall.
Remote controls have become increasingly popular, and for good reason. Who wants to get up to adjust the fan speed when you’re perfectly comfortable on the couch? Adding remote control capability usually runs $150 to $300, depending on whether your fan comes with this feature or requires a separate kit.
Sometimes your home’s electrical system needs a boost to handle your new fan properly. Adding a new circuit ensures your fan has dedicated power without overloading existing wiring. This upgrade typically costs $150 to $300 and involves installing a new breaker in your electrical panel plus running a dedicated line to the fan location.
Ceiling Height and Fan Type
Your room’s physical characteristics and your fan choice significantly influence installation complexity and cost.

High ceilings create both opportunities and challenges. While they allow for dramatic, eye-catching installations, they also require downrods to bring the fan to an optimal height for air circulation – typically 8 to 10 feet from the floor. The downrods themselves are relatively inexpensive ($10 to $100), but the increased installation height means your installer needs taller ladders or scaffolding, increasing labor time and cost.
For rooms with low ceilings under 8 feet, low-profile or hugger fans mount flush against the ceiling, maximizing headroom while maintaining safety. These installations typically don’t require special equipment, keeping costs in the standard range.
Outdoor installations introduce weather considerations that impact both material and labor costs. Damp-rated fans work well for covered patios and porches, while wet-rated fans handle direct weather exposure. Both types cost more than indoor fans due to their weather-resistant construction, and installation requires special attention to weatherproofing and appropriate wiring methods. Expect to invest $250 to $3,000 for the complete outdoor setup, with additional costs of $500 to $1,500 for proper outdoor wiring.
Smart fans represent the latest evolution in ceiling fan technology. These Wi-Fi connected units offer app control, voice assistant integration, and programmable schedules. While installation complexity remains similar to standard fans, their higher purchase price (starting around $120 and reaching well over $1,000 for premium models) significantly impacts your total project investment.
DIY vs. Professional Installation: A Cost and Safety Analysis
When you’re standing in the home improvement store, looking at that perfect ceiling fan, the question inevitably pops up: “Should I install this myself or call in a pro?” It’s tempting to think about the money you could save, but let’s walk through what each option really means for your wallet and your peace of mind.
If you’re thinking about going the DIY route for a simple fan replacement, your ceiling fan installation cost would mainly be the fan itself plus any tools you might need. We’re talking about $50 to $300 for the fan, plus maybe $25 to $50 for basic tools if you don’t already have them. That puts your total somewhere between $100 and $275. Compare that to hiring a professional who might charge $50 to $200 for labor on top of the fan cost, and the savings seem pretty appealing.
But here’s where we need to pump the brakes a bit. Those savings only make sense if you’re comfortable working with electricity and have the skills to do the job safely. Even a “simple” replacement involves turning off breakers, handling live wires, and making sure everything is properly connected.
Professional installation brings benefits that go way beyond just getting the job done. Safety is the big one here – and we can’t stress this enough. Working with electrical wiring carries real risks. One wrong move and you could face serious injury from electrocution. Professional installers have the training and experience to handle these situations safely.
There’s also the time factor to consider. An experienced installer can knock out a basic replacement in 1 to 2 hours, while a new installation with wiring might take them 2 to 4 hours. If you’re new to this kind of work, you could easily find yourself spending an entire weekend on what should be a quick project.
Professional installation also comes with warranty protection. Most reputable installers guarantee their work, which means if something goes wrong, they’ll come back and fix it at no extra charge. They also have the expertise to handle unexpected problems that might pop up during installation.
Here’s something interesting we learned: properly installed ceiling fans can actually contribute to better indoor air quality. The CDC notes that improved ventilation can reduce airborne viruses, and a professionally installed fan ensures you’re getting optimal air circulation throughout your space.
Now, let’s talk about the risks of going DIY. Electrocution is the obvious scary one, but it’s not the only concern. Improper mounting is surprisingly common with DIY installations. Ceiling fans are heavy, and when they’re spinning, they create additional forces that need to be properly supported. If the fan isn’t securely mounted to a fan-rated electrical box and properly anchored to ceiling joists, you could end up with anything from annoying wobbling to a fan literally falling from the ceiling.
Code violations are another hidden cost of DIY gone wrong. If your electrical work doesn’t meet local codes, you might face expensive corrections down the line. This becomes especially important if you ever sell your home – unpermitted electrical work can create problems during inspections.

Our honest take? If you’re simply swapping out an existing fan for a new one, and you’re comfortable with basic electrical work, DIY might be okay. But if your project involves any new wiring, circuit modifications, or if you have any doubts about the existing electrical setup, calling in a professional is worth every penny. The peace of mind alone makes it a smart investment, and when you factor in the potential costs of fixing DIY mistakes, professional installation often ends up being the more economical choice in the long run.
How to Save Money and Hire the Right Pro
Let’s be honest – nobody wants to overpay for a ceiling fan installation. The good news? There are several smart strategies to keep your ceiling fan installation cost reasonable without cutting corners on quality or safety.

One of the smartest moves you can make is bundling installations if you need multiple fans. Since many electricians charge higher rates for the first hour and then reduce their hourly rate, having several fans installed during the same visit can significantly lower your per-fan labor cost. Think of it like buying in bulk – you get better value.
Timing can also work in your favor. Purchasing off-season during late fall or winter often yields better deals on fan units themselves. Retailers are eager to move cooling equipment when demand is low, and you can sometimes snag quality fans at substantial discounts.
Here’s a tip that can save you hundreds: choose existing fixture locations whenever possible. Installing a fan where a light fixture or old fan already exists is dramatically cheaper than creating a brand-new installation point. You’ll avoid the major expense of running new electrical lines, which can easily add $500 to $1,500 to your project.
Don’t overlook the long-term savings of Energy Star-certified models either. While they might cost $50 to $100 more upfront, their 60% better efficiency compared to standard fans means lower electricity bills for years to come. Over the fan’s lifetime, this efficiency often pays for the initial premium.
Now, when it comes to hiring the right professional, asking the right questions upfront can save you from unpleasant surprises later. We always recommend starting with the basics: Are you licensed, bonded, and insured? This isn’t just paperwork – it’s your protection if something goes wrong.
You’ll also want to ask for an itemized estimate that breaks down labor, materials, and any potential additional costs. A reputable installer will happily explain what’s included and what might come up during the work. Don’t forget to ask about their warranty – good professionals stand behind their work.
Verifying credentials is non-negotiable, especially for electrical work. A licensed electrician has the training and insurance to handle your project safely. Bonded and insured professionals protect you from liability if accidents happen or damage occurs during installation.
Getting multiple quotes from different contractors is always wise. Three quotes give you a good sense of fair pricing and help you spot any outliers – whether suspiciously low bids that might indicate corner-cutting or inflated prices that don’t match the scope of work.
The cheapest option isn’t always the best value. Look for contractors who communicate clearly, provide detailed estimates, and have solid references. A slightly higher upfront cost often translates to better workmanship and fewer headaches down the road.
Just as we help you steer home improvements like ceiling fan installations, we can also guide you through bigger real estate decisions. When you’re ready for your next move, find the right real estate agent for your next project using our proven framework for success.
Frequently Asked Questions about Ceiling Fan Installation
We know that planning a ceiling fan installation can bring up lots of questions. After helping countless homeowners steer their ceiling fan installation cost decisions, we’ve noticed the same concerns come up again and again. Let’s address the most common ones to help you feel confident about your project.
How long does it take to install a ceiling fan?
The timeline for your ceiling fan installation really depends on what you’re starting with and where you want to end up.
If you’re doing a simple replacement – swapping out an old fan or light fixture for a new fan where compatible wiring already exists – you’re looking at the quickest scenario. A professional can typically wrap this up in 1 to 2 hours. It’s straightforward work that doesn’t require running new wires or making major modifications.
When you’re dealing with a new installation that requires wiring, the timeline naturally extends to 2 to 4 hours. This accounts for the time needed to run new electrical lines from an existing power source, install a fan-rated electrical box if one isn’t already there, and make all the proper connections safely.
Several complex factors can add time to any installation. High ceilings are a big one – they require specialized equipment like tall ladders or scaffolding, and everything just takes longer when you’re working at height. If you’re installing multiple fans in one visit, that obviously extends the timeline but often saves money overall. Adding new wall switches or needing to patch and paint drywall after running wires will also increase the total project time.
Can you install a ceiling fan where a light fixture was?
This is one of our most frequently asked questions, and the answer is almost always yes! Installing a ceiling fan where a light fixture used to be is actually one of the most common scenarios we see.
The key requirement is making sure you have a fan-rated electrical box. Here’s the thing – regular light fixtures are relatively light and don’t move. Ceiling fans, on the other hand, are heavier and create vibration and movement when they operate. Standard electrical boxes that were perfectly fine for light fixtures simply aren’t designed to handle this additional stress.
A professional installer will always perform a weight support check to evaluate whether the existing box can safely support your new fan. If it can’t, they’ll need to swap it out for a fan-rated box that’s specifically designed to handle the weight and movement. This upgrade typically adds $100 to $150 to your total project cost, but it’s absolutely essential for safety.
The good news is that the existing wiring from your old light fixture can usually be used for the new fan, which keeps costs reasonable compared to installing a fan in a completely new location.
Is installing a ceiling fan a good investment for my home?
We absolutely believe ceiling fans are one of the smartest home improvements you can make, and here’s why the numbers back us up.
The energy savings alone often justify the investment. Ceiling fans create a wind-chill effect that can make a room feel 4 to 8 degrees cooler without actually changing the temperature. This means you can set your thermostat higher in summer while staying just as comfortable, leading to significant savings on your cooling bills. In winter, running the fan in reverse helps push warm air down from the ceiling, improving heat distribution throughout the room.
Beyond the financial benefits, ceiling fans provide year-round air circulation that simply makes your home more comfortable. There’s something wonderful about that gentle breeze on a warm day, or the way a fan can eliminate those stuffy, stagnant air pockets that make rooms feel uncomfortable.
From an aesthetic appeal standpoint, today’s ceiling fans are far from the basic white models of decades past. They come in countless styles, finishes, and sizes that can genuinely improve your home’s decor. A well-chosen fan often becomes an attractive focal point that ties a room together.
When it comes to increased home desirability, ceiling fans hit that sweet spot of being both practical and appealing to potential buyers. They’re the kind of upgrade that people notice and appreciate, contributing positively to your overall Real Estate Valuation. While they might not dramatically increase your home’s value, they certainly don’t hurt it, and they make your space more comfortable for as long as you live there.
Conclusion: Budgeting for Your Home Upgrade
Planning for a ceiling fan installation doesn’t have to feel overwhelming once you understand the basics. Throughout our guide, we’ve finded that ceiling fan installation cost spans quite a range – from as little as $100 for straightforward replacements to well over $2,000 for complex installations that need extensive electrical work.
Most homeowners can expect to invest somewhere in the middle, with typical professional installations averaging $248-$250. But here’s what we’ve learned: your specific situation matters more than any average. The age of your home, the complexity of your electrical system, and your chosen fan style all play starring roles in determining your final cost.
We’ve seen how choosing between a handyman and a licensed electrician can impact both your budget and your peace of mind. While handymen work well for simple swaps, electricians become essential when new wiring enters the picture. The fan itself – whether it’s a basic model or a high-tech smart fan – also influences your investment, along with necessary accessories like fan-rated electrical boxes and mounting hardware.
Assessing your specific project needs is really the key to successful budgeting. We can’t stress enough how important it is to be honest about your DIY skills and comfort level with electrical work. Yes, doing it yourself might save on labor costs, but the potential risks – from safety hazards to code violations – often make professional installation the smarter financial choice in the long run.
The beauty of being well-informed is that you can make decisions that truly fit your situation and budget. Getting multiple quotes, asking the right questions, and understanding exactly what your project entails helps you balance upfront costs with long-term benefits like energy savings, improved comfort, and improved home value.
Installing a ceiling fan isn’t just another expense on your home improvement list. It’s an investment that pays dividends in comfort, energy efficiency, and even your home’s appeal to future buyers. The improved air circulation and aesthetic improvement often make this upgrade worthwhile for years to come.
At Your Guide to Real Estate, we believe in empowering you with the knowledge to make confident homeownership decisions. Just as we’ve walked you through the ins and outs of ceiling fan costs, we’re here to support you through every aspect of owning and improving your home. When you’re ready to explore broader financing options for your home improvements, Understand your home financing options with our beginner’s guide to mortgages.


")