Why a Well-Designed Garage Sale Flyer Makes All the Difference
A garage sale flyer is your first (and often only) chance to attract buyers to your sale and turn your unwanted items into cash. Whether you’re decluttering before a big move, doing spring cleaning, or preparing your home for the real estate market, an effective flyer can mean the difference between a packed driveway and an empty one.
Essential Elements of an Effective Garage Sale Flyer:
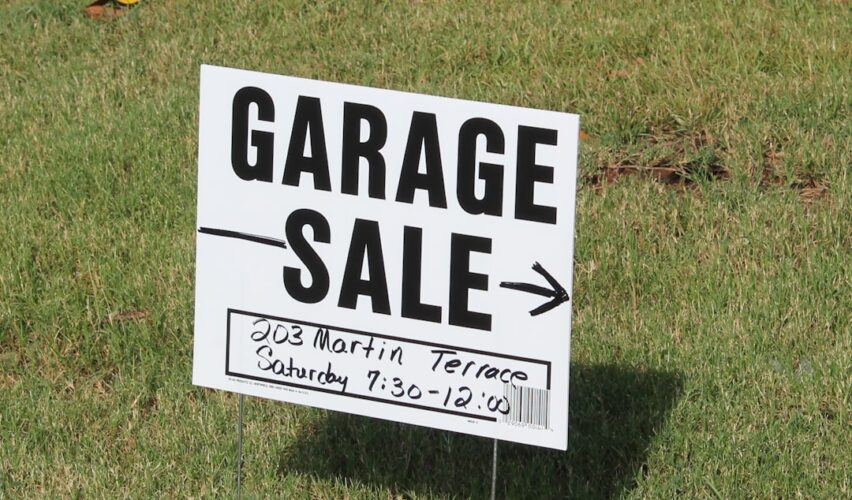
- Clear headline with bold, large text
- Complete details: date, time, and full address
- Key items list (furniture, electronics, tools, etc.)
- Eye-catching design that’s readable from a distance
- Strategic distribution to community boards and local businesses
The research shows that platforms like Canva offer over 20,000 templates specifically for yard sale flyers, while PosterMyWall provides 1,410+ free garage sale flyer templates – proving just how important these marketing tools are for successful sales.
As one garage sale expert puts it: “Letting go of pre-loved items can be a challenge. However, if you think of the situation as helping your things find a new home by selling them, it can make it easier for your heart to handle.”
A thoughtfully designed flyer doesn’t just advertise your sale – it creates excitement, drives foot traffic, and helps you maximize your profits. This is especially valuable if you’re preparing to sell your home and need to declutter effectively.

Explore more about garage sale flyer:
Step 1: Gather the Essential Information for Your Flyer
Think of your garage sale flyer as a roadmap for treasure hunters. Without the right details, even the most eager bargain shoppers will drive right past your sale. Before you get excited about fancy fonts or colorful designs, you need to nail down the basics that will actually get people to show up.
The foundation of any successful flyer starts with your headline – that attention-grabbing phrase that makes people stop scrolling or walking. Whether it’s “HUGE GARAGE SALE!” or “MOVING SALE – EVERYTHING MUST GO!” this will be the star of your design, so jot down a few options now.
Next, get crystal clear about your timing. Date and times might seem obvious, but you’d be amazed how many flyers leave people guessing. Is it Saturday only? The whole weekend? Write it out completely: “Saturday, May 18th, 8 AM – 2 PM” leaves no room for confusion.
Your full address is non-negotiable, but don’t stop there. Add those major cross-streets or landmarks that help people actually find you. In sprawling areas, saying “near Walmart on Main Street” or “two blocks from the high school” can be the difference between a visitor and someone who gives up and goes home.
Here’s where the magic happens: your key items list. This is your chance to create excitement and draw specific buyers. Don’t just say “lots of stuff” – that tells people nothing. Instead, mention your furniture, electronics, baby gear, vintage finds, or power tools. Be specific: “Antique dresser, PlayStation 5, baby clothes (0-12 months)” gives shoppers a reason to prioritize your sale over others.
Finally, include any special notes that set expectations. Are you hosting a multi-family sale (always a crowd-pleaser)? Is it cash only, or do you accept Venmo? Do you welcome early birds, or should they wait until your official start time? These details prevent awkward conversations and help your sale run smoothly.
Getting these essentials right from the start creates a solid foundation for your garage sale flyer. It’s all part of our proven framework for turning clutter into cash – whether you’re preparing for a big move or just creating more space in your home.
Step 2: Choose a Winning Design Method and Theme
Now that you’ve gathered all your essential information, it’s time to bring your garage sale flyer to life with the right design approach. This step can make or break your flyer’s effectiveness – and trust me, the difference between a cluttered mess and a clean, professional design is like night and day.

The good news? You don’t need to be a graphic designer to create something that looks amazing. Pre-made templates are often your best friend here, especially if you’d rather spend your time organizing your sale than wrestling with design software. Platforms like Canva offer over 20,000 templates specifically for yard sales, while PosterMyWall provides more than 1,410 free options. These templates come with professional layouts that ensure your information is both readable and visually appealing.
What makes templates so wonderful is their flexibility. You can easily customize the text, swap out colors, and even add your own photos without starting from scratch. The heavy lifting of good design principles – like proper spacing, font pairing, and visual hierarchy – is already done for you.
If you’re feeling more adventurous, DIY design gives you complete creative control. This approach works well if you’re comfortable with design tools or have a specific vision in mind. Just remember that with great power comes great responsibility – you’ll need to pay close attention to readability and visual impact (which we’ll cover in Step 4).
For those who want something between templates and full DIY, online design tools offer the perfect middle ground. These platforms provide drag-and-drop interfaces that make design accessible to everyone, complete with libraries of fonts, graphics, and images.
Choosing the right theme can make your flyer memorable and attract the right buyers. A vintage or antique theme with warm browns and greens works beautifully if you’re selling collectibles or older items. For household goods and electronics, a modern, minimal approach with clean lines and plenty of white space feels fresh and organized.
If you’re selling lots of children’s items, a family-friendly theme with bright colors and playful elements will catch parents’ attention from across the parking lot. You might even consider a seasonal theme – spring florals for your spring cleaning sale or cozy autumn touches for a fall declutter.
The key is selecting a design that feels authentic to what you’re selling while remaining eye-catching and professional. As you prepare for your next move or simply declutter your current space, a well-designed flyer is an investment in your sale’s success.
For some charming, ready-to-print options that take the guesswork out of design, check out these Free Garage Sale Printables. They’re perfect for getting started quickly while still looking polished and professional.
Step 3: Craft a Bold, Unmissable Headline
Think of your headline as the first impression that makes or breaks your sale. When someone’s driving by your neighborhood or scanning a community bulletin board, your garage sale flyer has maybe three seconds to grab their attention. That’s where a powerful headline becomes your secret weapon.
Make it impossible to ignore. Your headline should be the largest text on your entire flyer – we’re talking about text so big it practically jumps off the page. This isn’t the time to be subtle or modest about your sale.
The magic happens when you use action words that create excitement and urgency. “HUGE GARAGE SALE!” tells people they’ll find plenty of treasures. “MOVING SALE!” signals that you’re motivated to sell and prices might be extra negotiable. “EVERYTHING MUST GO!” creates that irresistible sense of urgency that gets bargain hunters moving.
Keep your headline short and punchy. People need to read it quickly, often while walking or driving past. A headline like “GIANT MULTI-FAMILY SALE!” works perfectly because it’s brief but tells the whole story – lots of variety from multiple households.
Consider what makes your sale special. If you’re preparing your home for the real estate market and need to declutter quickly, “MOVING SALE – EVERYTHING MUST GO!” immediately explains why you’re selling and suggests great deals. If it’s a community event, “NEIGHBORHOOD GARAGE SALE!” promises a bigger selection and more variety.
Your font size hierarchy should guide readers naturally from your bold headline down to the essential details. Think of it like a funnel – the massive headline draws them in, then medium-sized text for date and address keeps them engaged, and smaller text for your item list seals the deal.
A well-crafted headline turns your flyer from just another piece of paper into a treasure map that leads directly to your driveway. It’s that first spark of interest that transforms casual passersby into eager customers ready to dig through your items and make offers.
Step 4: Design for Readability and Visual Impact
Here’s the truth about garage sale flyer design: if people can’t read it quickly, they won’t read it at all. You could have the most amazing items for sale, but if your flyer looks like a jumbled mess or requires squinting to decipher, potential buyers will simply walk right past.
Think about it – most people encounter your flyer while they’re rushing past a community bulletin board or driving through the neighborhood. You have maybe three seconds to grab their attention and communicate your key information. That’s why readability isn’t just important – it’s everything.
Designing an effective garage sale flyer
The secret to visual impact starts with bright paper color. When you’re printing at home, skip the plain white paper and grab some neon yellow, orange, or green instead. Your flyer will practically glow against all those boring white notices on the community board. It’s a simple trick that makes a huge difference.
Font choice can make or break your flyer. I can’t stress this enough – avoid anything fancy, curly, or “decorative.” Those beautiful script fonts might look neat, but they’re absolutely terrible for garage sale flyers. Stick with bold, clear sans-serif fonts like Arial, Helvetica, or Open Sans. These fonts were designed to be readable, and that’s exactly what we need.
Here’s a pro tip: use only two fonts maximum. One bold font for your headline and one clean font for everything else. Too many different fonts make your flyer look like a ransom note rather than a professional advertisement.
White space is your secret weapon. New flyer makers often try to cram every inch with information, thinking more text means more sales. Actually, the opposite is true. Give your text room to breathe. Use white space to create clean sections and make your flyer easy to scan. Adding simple borders can help organize information without creating clutter.

Distance readability is crucial for outdoor posting. Your headline needs to be large enough that someone can read it from several feet away – think about people walking past or even driving slowly through a parking lot. The date, time, and address should be the next largest text elements.
High contrast is non-negotiable. Black text on bright white or neon backgrounds works beautifully. Avoid light gray text on white backgrounds or dark text on dark backgrounds – these combinations create eye strain and make reading difficult, especially in varying lighting conditions.
Keep your layout straightforward and logical. People should be able to follow a clear path: headline first, then date and time, then address, then your list of items. This natural flow matches how people process information when they’re in a hurry.
As real estate professionals know, presentation matters enormously when you’re trying to attract buyers. Your garage sale flyer is essentially marketing material for your mini-business, so treat it with the same care you’d give any important advertisement.
Step 5: Showcase Star Items with Photos or Graphics
There’s something magical about seeing a gorgeous vintage dresser or a pristine gaming console right there on a garage sale flyer. While your list of items tells people what you have, photos create that instant “I need to see this in person!” reaction that transforms casual browsers into serious shoppers.
Why photos work
Pictures do something that words simply can’t – they create immediate desire. When someone spots a photo of that mid-century modern chair or a barely-used bicycle, their imagination kicks in. They start picturing it in their own home, and suddenly your garage sale becomes a must-visit destination rather than just another weekend option.
Photos also build genuine anticipation. Instead of wondering if your “furniture” is worth the drive, shoppers can see exactly what treasures await them. This is especially powerful when you’re dealing with unique or vintage pieces that are hard to describe accurately in just a few words.
What to photograph
Your big-ticket items deserve the spotlight treatment. That dining room set, the flat-screen TV, or the exercise equipment gathering dust in your basement – these are the items that can draw people from miles away. Furniture and electronics photograph particularly well and often represent the highest-value items at your sale.
Collectibles and antiques are absolute gold for flyer photos. Whether it’s vintage jewelry, old records, or that quirky lamp from the 1970s, these unique pieces spark curiosity and excitement. Brand-name items also work beautifully – a photo of designer clothing or popular toy brands instantly communicates quality and value.
Sometimes showcasing entire categories works brilliantly too. A nicely arranged display of baby clothes, a collection of books, or an assortment of kitchen gadgets can appeal to shoppers looking for specific types of items.
Image quality
Your smartphone is perfectly capable of taking great garage sale photos – you don’t need professional equipment. The key is good lighting and clear focus. Take your photos during the day near a window or outside where natural light can make everything look its best.
Crop out distracting backgrounds and make sure your item is the clear star of the photo. A cluttered or messy background can actually hurt your sales by making items look less appealing. Keep things clean and simple.
Using simple graphics or icons
If you don’t have standout photos, or if you’re selling more common household items, simple graphics can still add visual appeal. A small baby bottle icon next to “Baby Items” or a wrench graphic near “Tools” helps organize information visually and makes your flyer more engaging than pure text.
Many online design tools include libraries of these helpful graphics, making it easy to add professional touches without any design experience.

You’re not just advertising items – you’re creating compelling reasons for people to choose your sale over the three others happening that same weekend. One or two high-quality photos of your best pieces can make all the difference between a busy, profitable sale and a quiet morning in your driveway.
Step 6: Proofread and Add a Clear Call to Action
You’re almost there! After putting so much effort into creating an attractive garage sale flyer, this final step ensures everything is perfect and gives your potential buyers clear direction on what to do next.
Think of proofreading as your safety net. One small mistake – like writing the wrong date or missing a digit in your address – can send eager shoppers to the wrong place or wrong day. That’s money walking right past your driveway!
Reading your flyer aloud is one of the best tricks for catching errors. Your ears often pick up mistakes that your eyes miss, especially awkward phrasing or missing words. Even better, ask a neighbor or family member to give it a quick look. Fresh eyes are amazing at spotting things you’ve read a dozen times but somehow overlooked.
Pay special attention to your date and time details. Double-check that Saturday actually falls on the date you’ve written. Make sure your AM and PM are clearly marked – you don’t want early birds showing up at 8 PM! And that address? Verify every single number and letter. One wrong digit could send your best customers three streets over.
Now let’s talk about your call to action – this is where you tell people exactly what you want them to do. Don’t just assume they know to show up! Use enthusiastic, welcoming phrases that create excitement. Try something like “Don’t miss out!” or “Come find your next treasure!” or simply “See you this Saturday!”
Your call to action should feel friendly and inviting, like you’re personally inviting each reader to stop by. Sometimes reinforcing your location one more time helps too: “Find us at [Your Address] for amazing deals!”
Here’s a modern touch that can really set your flyer apart: adding a QR code that links directly to your address on Google Maps. It’s easier than you might think – there are plenty of free QR code generators online. When someone scans it with their phone, boom! They have instant directions without typing anything. It removes that small friction point that might make someone think “I’ll remember the address” and then forget it entirely.
This attention to detail makes your garage sale flyer look professional and trustworthy. If you’re decluttering as part of preparing your home for sale, these same organizational skills will serve you well throughout your real estate journey.
Learn how to invest in property strategy
Step 7: Print and Execute Your Garage Sale Flyer Distribution Plan
You’ve crafted the perfect garage sale flyer – now comes the exciting part of getting it out into the world! Think of this step as your marketing campaign launch. The most beautiful flyer won’t sell a single item if it’s sitting on your kitchen counter, so let’s make sure yours reaches every potential treasure hunter in your area.
Printing tips:
Before you start your distribution blitz, let’s talk about getting quality prints that will represent your sale well. Paper type matters more than you might think – while standard printer paper works fine, slightly heavier cardstock gives your flyers a more professional feel and holds up better outdoors. If you’re planning a large distribution, consider heading to a professional printing service like Staples or Office Max instead of draining your home printer’s ink cartridges.
Bright paper colors (like neon yellow or orange) are your secret weapon for standing out on crowded bulletin boards. Make sure you have plenty of ink if printing at home – there’s nothing worse than running out halfway through your print run! Plan to print extra copies beyond what you initially think you’ll need. You’ll be surprised how many spots you’ll find once you start looking.
Where to post your garage sale flyer:
The key to successful flyer distribution is thinking like your potential customers. Where do people in your community naturally pause and look around? Community bulletin boards are absolute gold mines – grocery stores, coffee shops, libraries, community centers, and laundromats all typically welcome local announcements.
Don’t overlook local businesses either. That neighborhood barber shop, diner, or hardware store might be happy to display your flyer (always ask permission first!). These spots often have regular customers who live nearby – exactly the audience you want.
Neighborhood entrances can alert entire subdivisions to your sale, while high-traffic intersections near your home catch commuters and passersby. Just remember to check your local rules first – some areas have restrictions on where you can post signs.
On sale day itself, directional signs become crucial. These are different from your main flyers – they should be large, simple, and feature clear arrows guiding people from major roads directly to your driveway. Think of them as breadcrumbs leading treasure hunters to your door.
Legality and permits:
Before you start your posting spree, take a few minutes to check your local regulations. Some cities require permits for garage sales – for example, Oklahoma City requires a Garage Sale Permit. Others have specific rules about where signs can be posted (no utility poles, no public medians, etc.).
A quick call to your city’s planning department or a visit to their website can save you from potential fines that would eat into your profits. It’s always better to ask first than apologize later!
Leveraging social media:
Don’t limit yourself to physical flyers when digital promotion can dramatically expand your reach! Facebook groups for your neighborhood or community are perfect for sharing your flyer image along with details about your best items. Nextdoor is specifically designed for local connections and works wonderfully for garage sale announcements.
Craigslist and Facebook Marketplace let you list your sale as an event, using your flyer photo plus individual item photos. Many local newspapers and community websites also offer free event listings where you can post your sale details.
If you’re active on Instagram or TikTok, consider creating a quick video showcasing your star items or posting an eye-catching image of your flyer. The goal is to create excitement and anticipation before sale day arrives.
By combining strategic physical placement of your garage sale flyer with smart online promotion, you’re creating a comprehensive marketing approach that ensures maximum visibility. This multi-channel strategy turns your decluttering project into a successful cash-generating event – and if you’re preparing your home for the real estate market, you’re taking a smart step toward maximizing your property’s appeal.
Frequently Asked Questions
Creating your first garage sale flyer can feel overwhelming, and even experienced sellers sometimes stumble on the basics. Let’s tackle the most common questions we hear from people preparing for their sales.
What are some common mistakes to avoid on a garage sale flyer?
We’ve all seen those flyers that make us squint and give up after five seconds. The biggest mistake? Choosing fonts that look pretty but can’t be read from more than two feet away. Those gorgeous script fonts might look neat, but they’re useless when someone’s trying to read your flyer while walking by. Stick with bold, clean fonts that do their job.
Another major pitfall is cramming too much information onto one page. Your flyer isn’t your life story – it’s a quick advertisement. When you try to describe every single item you’re selling, you end up with a wall of text that nobody wants to read.
Vague details will also kill your turnout. Saying “lots of good stuff” tells potential buyers absolutely nothing. Instead, be specific: “vintage furniture, baby clothes, power tools.” People need to know if it’s worth their Saturday morning.
Don’t forget the basics either. We’ve seen flyers missing the house number or listing “morning to afternoon” instead of actual times. Double-check everything, especially your address and sale hours.
Finally, ignoring local posting rules can backfire quickly. Some cities have strict guidelines about where you can put signs, and getting fined defeats the whole purpose of making money from your sale.
How far in advance should I post my flyers?
Timing your garage sale flyer distribution is like planning a party – too early and people forget, too late and they’ve already made other plans.
Three to five days before your sale is the sweet spot for posting physical flyers. This gives people enough time to add your sale to their weekend treasure-hunting route without letting the information get buried under other weekend plans.
For social media and online platforms, you have more flexibility. Start building excitement about a week out with teaser posts, then share your complete flyer details three to five days before the sale. A friendly reminder the night before doesn’t hurt either.
Day-of directional signs are completely different – these should go up first thing the morning of your sale. Think of them as breadcrumbs leading shoppers directly to your driveway.
This staggered approach helps build anticipation while keeping your sale fresh in people’s minds when decision time comes.
Should I include prices on my flyer?
Here’s where many people overthink things. For most items, you don’t need to list specific prices on your flyer. Garage sale shoppers expect to browse, compare, and maybe negotiate a little. Trying to price everything on your flyer would create a cluttered mess.
However, big-ticket items are different. If you’re selling something valuable like a dining room set, exercise equipment, or electronics, mentioning the price can actually draw more serious buyers. “Treadmill – $200” or “Antique armoire – $150 OBO” gives people a reason to make the trip.
A general phrase like “Everything priced to sell!” works well to signal that you’re motivated without getting into specifics. Your flyer’s job is getting people to show up. Once they’re browsing your tables, your actual pricing and friendly salesmanship will close the deals.
The key is keeping your garage sale flyer focused on the essential information that gets shoppers excited about visiting, not bogged down in details they can find when they arrive.
Conclusion: Turn Clutter into Cash and Prepare for Your Next Move
You’ve done it! You now have all the tools to create a garage sale flyer that actually works. From gathering your essential information to crafting that eye-catching headline, designing for maximum readability, and getting your flyers into the right hands – you’ve mastered the complete process.
Think about what you’ve accomplished here. You’ve learned to turn what might seem like a simple piece of paper into a powerful marketing tool. A well-designed garage sale flyer doesn’t just announce your sale – it creates excitement, drives real foot traffic, and helps you maximize every dollar from items that were just taking up space.
The seven steps we’ve covered give you a proven framework that takes the guesswork out of garage sale success. Gathering complete information ensures nobody gets lost trying to find you. Choosing the right design makes your flyer stand out from the crowd. Crafting a bold headline stops people in their tracks. Designing for readability means your message gets through loud and clear. Showcasing star items creates that “I need to see this!” moment. Proofreading and adding a call to action eliminates confusion and tells people exactly what to do. Finally, strategic distribution puts your flyer in front of the right eyes at the right time.
But here’s something even more valuable – the skills you’ve developed creating this flyer translate beautifully to bigger real estate goals. The same attention to detail that makes your garage sale successful will serve you well when preparing your home for sale. Decluttering through a garage sale not only puts cash in your pocket but also makes your home more appealing to potential buyers.
At Your Guide to Real Estate, we see this connection all the time. Homeowners who master the art of presenting their belongings attractively in a garage sale often excel at staging their homes for the market. The organizational skills, the eye for what appeals to buyers, the ability to create compelling presentations – these all transfer directly to successful real estate transactions.
Whether you’re decluttering before a big move, clearing out space for new adventures, or preparing to put your home on the market, a successful garage sale can be your first step toward achieving bigger real estate dreams. Every item you sell is one less thing to move, one more dollar in your pocket, and one step closer to that stress-free transition we’re all looking for.
Learn more about working with top real estate agents


")